Appearance
Unreal Engine 5 Integration
This guide covers the full integration of SARD into an Unreal Engine 5 project, from creating the required C++ loader class through to Blueprint setup and running SardUpdater.
Prerequisites
- Unreal Engine 5 (any minor version)
- Visual Studio 2022 with the Game Development with C++ workload installed
- A SARD key obtained from the admin panel
Overview
SARD requires a C++ Actor class inside your project that loads armour.dll at runtime and exposes three functions to Blueprint: SardInit, SardSetUserId, and SardFinalize. The armour.dll file itself is downloaded automatically by SardUpdater.exe and does not need to be added manually.
Part 1 — Creating the C++ Loader Class
Step 1: Add a New C++ Class
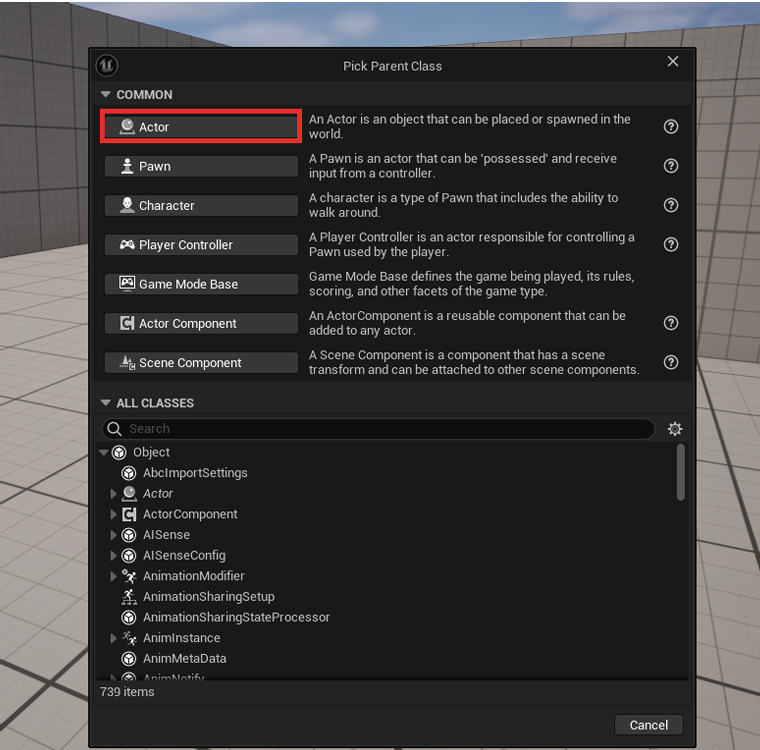
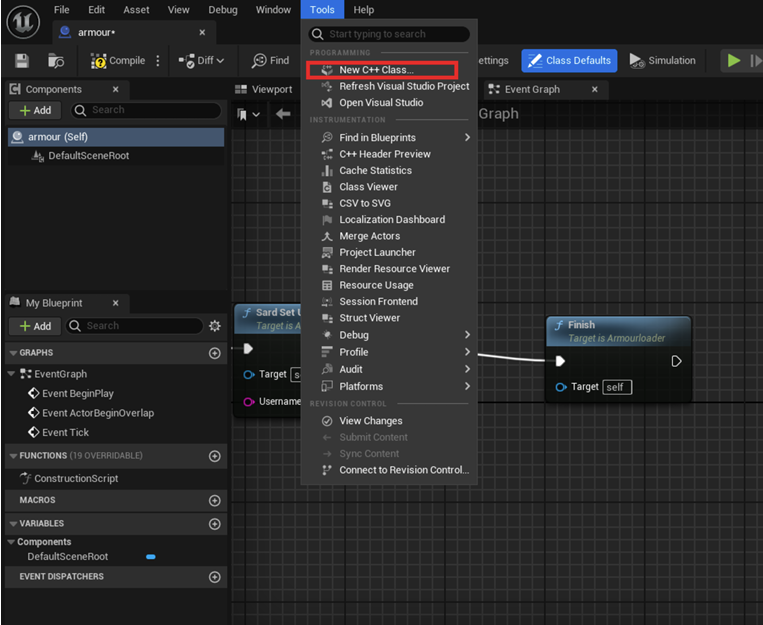
In the UE5 editor, navigate to Tools > New C++ Class.
- Select Actor as the parent class
- Name the class
DllLoader - Click Create Class
UE5 will generate DllLoader.h and DllLoader.cpp and open Visual Studio. If Visual Studio does not open automatically, locate your .uproject file in Windows Explorer, right-click it, select Generate Visual Studio project files, then open the resulting .sln file.
Step 2: DllLoader.h
Replace the entire contents of DllLoader.h with the following.
Important: The macro YOURPROJECTNAME_API must match your project's module name in uppercase, followed by _API. To find your module name, open the Source/ folder inside your project directory — the subfolder name is your module name. For example, a project named MyGame uses MYGAME_API.
cpp
#pragma once

#include "CoreMinimal.h"
#include "GameFramework/Actor.h"
#include "DllLoader.generated.h"

UCLASS()
class YOURPROJECTNAME_API ADllLoader : public AActor
{
    GENERATED_BODY()

public:
    ADllLoader();

    virtual void Tick(float DeltaTime) override;

    UFUNCTION(BlueprintCallable, Category = "SARD")
    bool SardInit(FString DllPath, FString SessionID);

    UFUNCTION(BlueprintCallable, Category = "SARD")
    void SardSetUserId(FString UserId);

    UFUNCTION(BlueprintCallable, Category = "SARD")
    void SardFinalize();

protected:
    virtual void BeginPlay() override;

private:
    void* sard_lib;
    void (*SardFinalizeFuncPtr)();
};
Note on parameter types: All UFUNCTION(BlueprintCallable) parameters must use FString, not const char*. Unreal's reflection system does not support raw C pointers, and using them will cause the functions to silently disappear from Blueprint search.
Note on Windows headers: Windows types such as HMODULE must not appear in the header file. Including them causes widespread conflicts with Unreal's internal types. They are used only in the .cpp file, as shown below.
Step 3: DllLoader.cpp
Replace the entire contents of DllLoader.cpp with the following:
cpp
#include "DllLoader.h"

#include "Windows/AllowWindowsPlatformTypes.h"
#include <windows.h>
#include "Windows/HideWindowsPlatformTypes.h"

ADllLoader::ADllLoader()
{
    PrimaryActorTick.bCanEverTick = true;
    sard_lib = nullptr;
    SardFinalizeFuncPtr = nullptr;
}

void ADllLoader::BeginPlay()
{
    Super::BeginPlay();
}

void ADllLoader::Tick(float DeltaTime)
{
    Super::Tick(DeltaTime);
}

bool ADllLoader::SardInit(FString DllPath, FString SessionID)
{
    sard_lib = (void*)LoadLibraryA(TCHAR_TO_UTF8(*DllPath));

    if (sard_lib)
    {
        SardFinalizeFuncPtr = (void(*)())GetProcAddress((HMODULE)sard_lib, "sardFinalize");

        void (*SardInitialize)(const char*) = (void(*)(const char*))GetProcAddress((HMODULE)sard_lib, "sardInitialize");

        if (SardInitialize)
        {
            SardInitialize(TCHAR_TO_UTF8(*SessionID));
            return true;
        }
        else
        {
            UE_LOG(LogTemp, Warning, TEXT("SARD: Failed to get sardInitialize address."));
        }
    }
    else
    {
        UE_LOG(LogTemp, Warning, TEXT("SARD: Failed to load DLL at path: %s"), *DllPath);
    }

    return false;
}

void ADllLoader::SardSetUserId(FString UserId)
{
    if (!sard_lib)
    {
        UE_LOG(LogTemp, Warning, TEXT("SARD: DLL not loaded. Call SardInit first."));
        return;
    }

    void (*SetUserIdFunc)(const char*) = (void(*)(const char*))GetProcAddress((HMODULE)sard_lib, "sardSetUserId");

    if (SetUserIdFunc)
    {
        SetUserIdFunc(TCHAR_TO_UTF8(*UserId));
    }
    else
    {
        UE_LOG(LogTemp, Warning, TEXT("SARD: Failed to get sardSetUserId address."));
    }
}

void ADllLoader::SardFinalize()
{
    if (!sard_lib)
    {
        UE_LOG(LogTemp, Warning, TEXT("SARD: DLL not loaded. Call SardInit first."));
        return;
    }

    if (SardFinalizeFuncPtr)
    {
        SardFinalizeFuncPtr();
    }
    else
    {
        UE_LOG(LogTemp, Warning, TEXT("SARD: Failed to get sardFinalize address."));
    }

    FreeLibrary((HMODULE)sard_lib);
    sard_lib = nullptr;
    SardFinalizeFuncPtr = nullptr;
}
The AllowWindowsPlatformTypes.h / HideWindowsPlatformTypes.h pair is the correct method for using Windows API functions in UE5 without causing include conflicts. These must only ever appear in .cpp files.
Step 4: Build the Project
In Visual Studio, press Ctrl+Shift+B to build the solution. Confirm that the output reads Build succeeded before continuing. If the build fails, verify that the _API macro in DllLoader.h matches your project's module name exactly.
Part 2 — Blueprint Setup
Step 5: Create the Blueprint
The Blueprint class wraps the C++ loader and is what gets placed in the level.
- Open the Content Browser
- Right-click in an empty area and select Blueprint Class
- In the Pick Parent Class dialog, search for
DllLoaderand select it - Name the Blueprint (for example,
BP_SARD)
Important: The parent class must be set to DllLoader at creation time. Do not create a Blueprint from Actor and change the parent class afterwards — this can corrupt the Event Graph.
Step 6: Open the Event Graph
Double-click the Blueprint to open it. If the graph area is blank, go to Window > My Blueprint to open the panel, locate EventGraph under the Graphs section, and double-click it to open the graph.
Step 7: Wire the Blueprint Nodes
The integration requires three separate connections in the Event Graph.
On game start — initialize SARD
Connect Event BeginPlay to Sard Init. In the Dll Path field, enter SARD/armour.dll. The Session ID field can be left empty or populated with a session token from your game server if applicable.
Event BeginPlay  -->  Sard Init
                       Dll Path:   SARD/armour.dll
                       Session ID: (optional)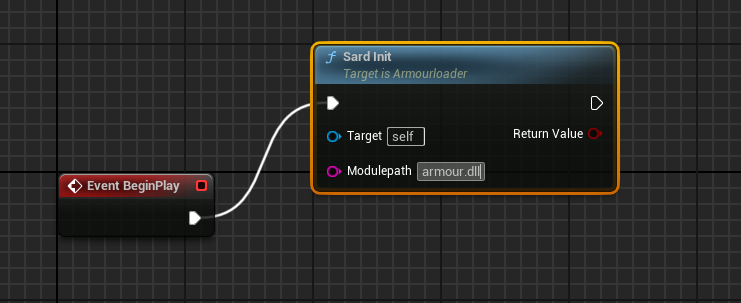
After player authentication — set the user ID
Sard Set User Id should be called after the player has authenticated with your game server, not at game start. Connect it to the appropriate point in your login flow and pass the player's identifier into the User Id field.
[Post-login event]  -->  Sard Set User Id
                          User Id: (player identifier)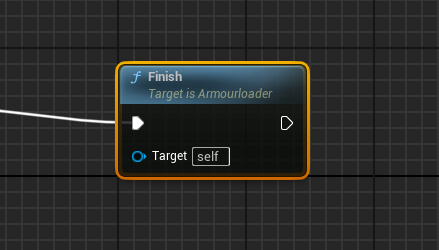
On game exit — finalize SARD
Connect Event End Play to Sard Finalize. This must also be called in any crash handling flow your project implements.
Event End Play --> Sard Finalize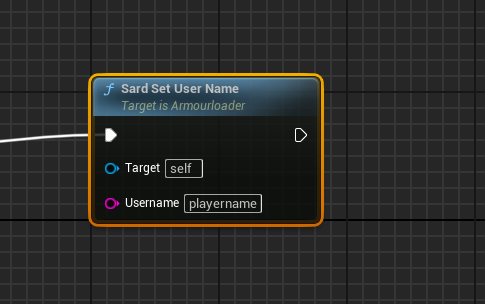
Step 8: Compile the Blueprint
Click Compile in the Blueprint editor toolbar. The button should display a green checkmark when compilation succeeds. If warnings or errors appear, check the Output Log (Window > Output Log) for details.
Step 9: Place the Blueprint in the Level
The Blueprint Actor must be present in the game world at runtime for the SARD functions to execute.
- Drag the Blueprint from the Content Browser into the level viewport
- Its placement position does not matter — it has no visible representation
- Save the level
Part 3 — Running SardUpdater
SardUpdater.exe downloads armour.dll and any other required files. It must be run before launching the game.
- Package or build your game
- Download SARDUpdater.exe from the admin panel
- Create a folder named
SARDin the same directory as your game's.exe - Place
SARDUpdater.exeinside theSARDfolder - Open a command prompt in that directory and run:
SardUpdater.exe -sardKey YOUR-SARD-KEY -sardGame "..\YourGame.exe"Replace YOUR-SARD-KEY with the key from your admin panel and YourGame.exe with the name of your game executable.
After SardUpdater completes, armour.dll will be present at SARD/armour.dll relative to the game executable. This matches the path entered in the Blueprint's Sard Init node.
Shortly after a successful run, the admin panel will confirm that the integration is active.